How to install a Jenkins master that spawn slaves on demand with AWS EC2

Context
At PetalMD we build cloud applications for Healthcare professionals. We have a back-end running Ruby on Rails (API / admin app) and front-end apps in pure JavaScript. All applications have unit/end-to-end tests and can be deployed as needed, typically several times a day.
The purpose of the article is to give a quick overview of how to install a Jenkins master that spawn slaves on demand with AWS EC2
Requirements
- When Jenkins doesn't have enough slaves for running pending jobs, it needs to increase the number of slaves.
- When it has more slaves than running + pending jobs, it needs to remove sleeping slaves
Implementation
Jenkins master
Install and configure Jenkins
Create a new EC2 instance with the Amazon Linux AMI 2016.03 AMI.
For the following instruction, you can prefix them with sudo or become root (sudo su - or sudo -i as you wish).
Update the system and install Jenkins
$ yum update -y
$ wget -O /etc/yum.repos.d/jenkins.repo http://pkg.jenkins-ci.org/redhat/jenkins.repo
$ rpm --import http://pkg.jenkins-ci.org/redhat/jenkins-ci.org.key
$ yum install -y jenkins
Update Jenkins configuration
Update /etc/sysconfig/Jenkins for authorizing Jenkins to use some environment variables used by our plugins plus change default timezone for your timezone.
JENKINS_ARGS="-Dhudson.model.ParametersAction.safeParameters=ghprbActualCommit,ghprbActualCommitAuthor,ghprbActualCommitAuthorEmail,ghprbAuthorRepoGitUrl,ghprbCommentBody,ghprbCredentialsId,ghprbGhRepository,ghprbPullAuthorEmail,ghprbPullAuthorLogin,ghprbPullAuthorLoginMention,ghprbPullDescription,ghprbPullId,ghprbPullLink,ghprbPullLongDescription,ghprbPullTitle,ghprbSourceBranch,ghprbTargetBranch,ghprbTriggerAuthor,ghprbTriggerAuthorEmail,ghprbTriggerAuthorLogin,ghprbTriggerAuthorLoginMention,GIT_BRANCH,sha1"

JENKINS_JAVA_OPTIONS="-Djava.awt.headless=true -Dhudson.model.ParametersAction.safeParameters=ghprbActualCommit,ghprbActualCommitAuthor,ghprbActualCommitAuthorEmail,ghprbAuthorRepoGitUrl,ghprbCommentBody,ghprbCredentialsId,ghprbGhRepository,ghprbPullAuthorEmail,ghprbPullAuthorLogin,ghprbPullAuthorLoginMention,ghprbPullDescription,ghprbPullId,ghprbPullLink,ghprbPullLongDescription,ghprbPullTitle,ghprbSourceBranch,ghprbTargetBranch,ghprbTriggerAuthor,ghprbTriggerAuthorEmail,ghprbTriggerAuthorLogin,ghprbTriggerAuthorLoginMention,GIT_BRANCH,sha1 -Dorg.apache.commons.jelly.tags.fmt.timeZone=America/New_York -Duser.timezone=America/New_York"
Register the service and start it
$ chkconfig Jenkins on
$ service Jenkins start
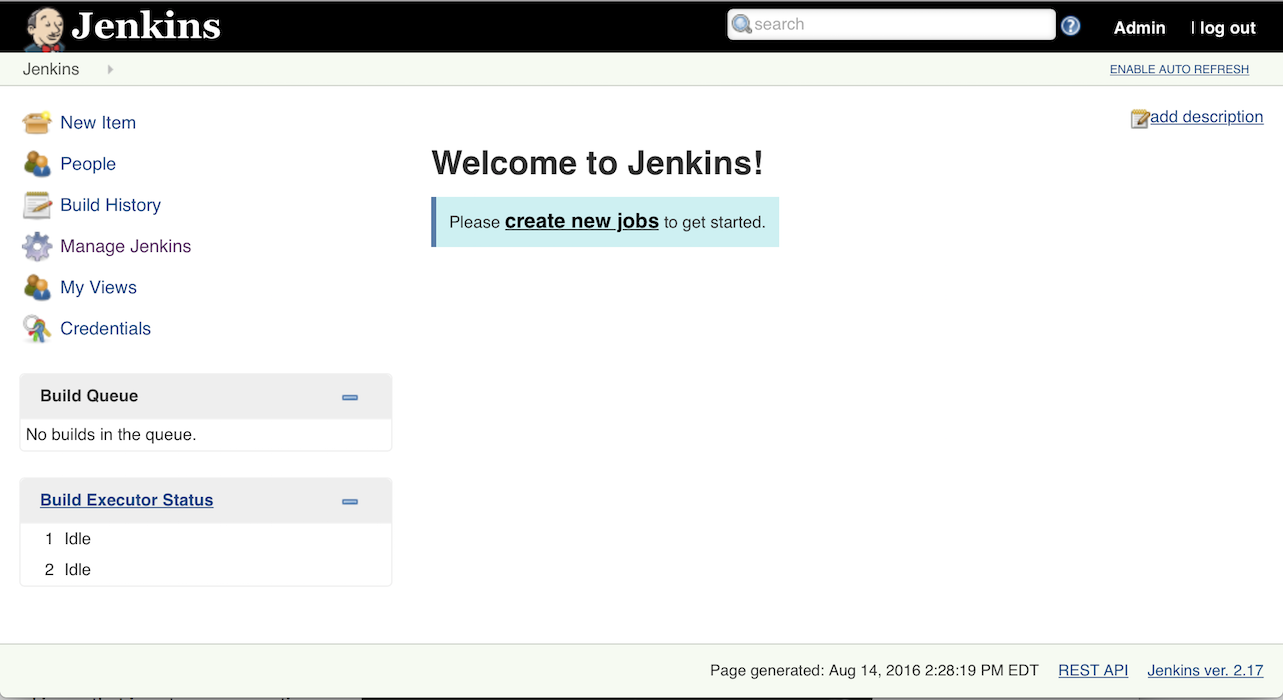
You now have a running Jenkins, you can open your browser and point it to: http://SERVER_IP:8080.
You should have this screen:
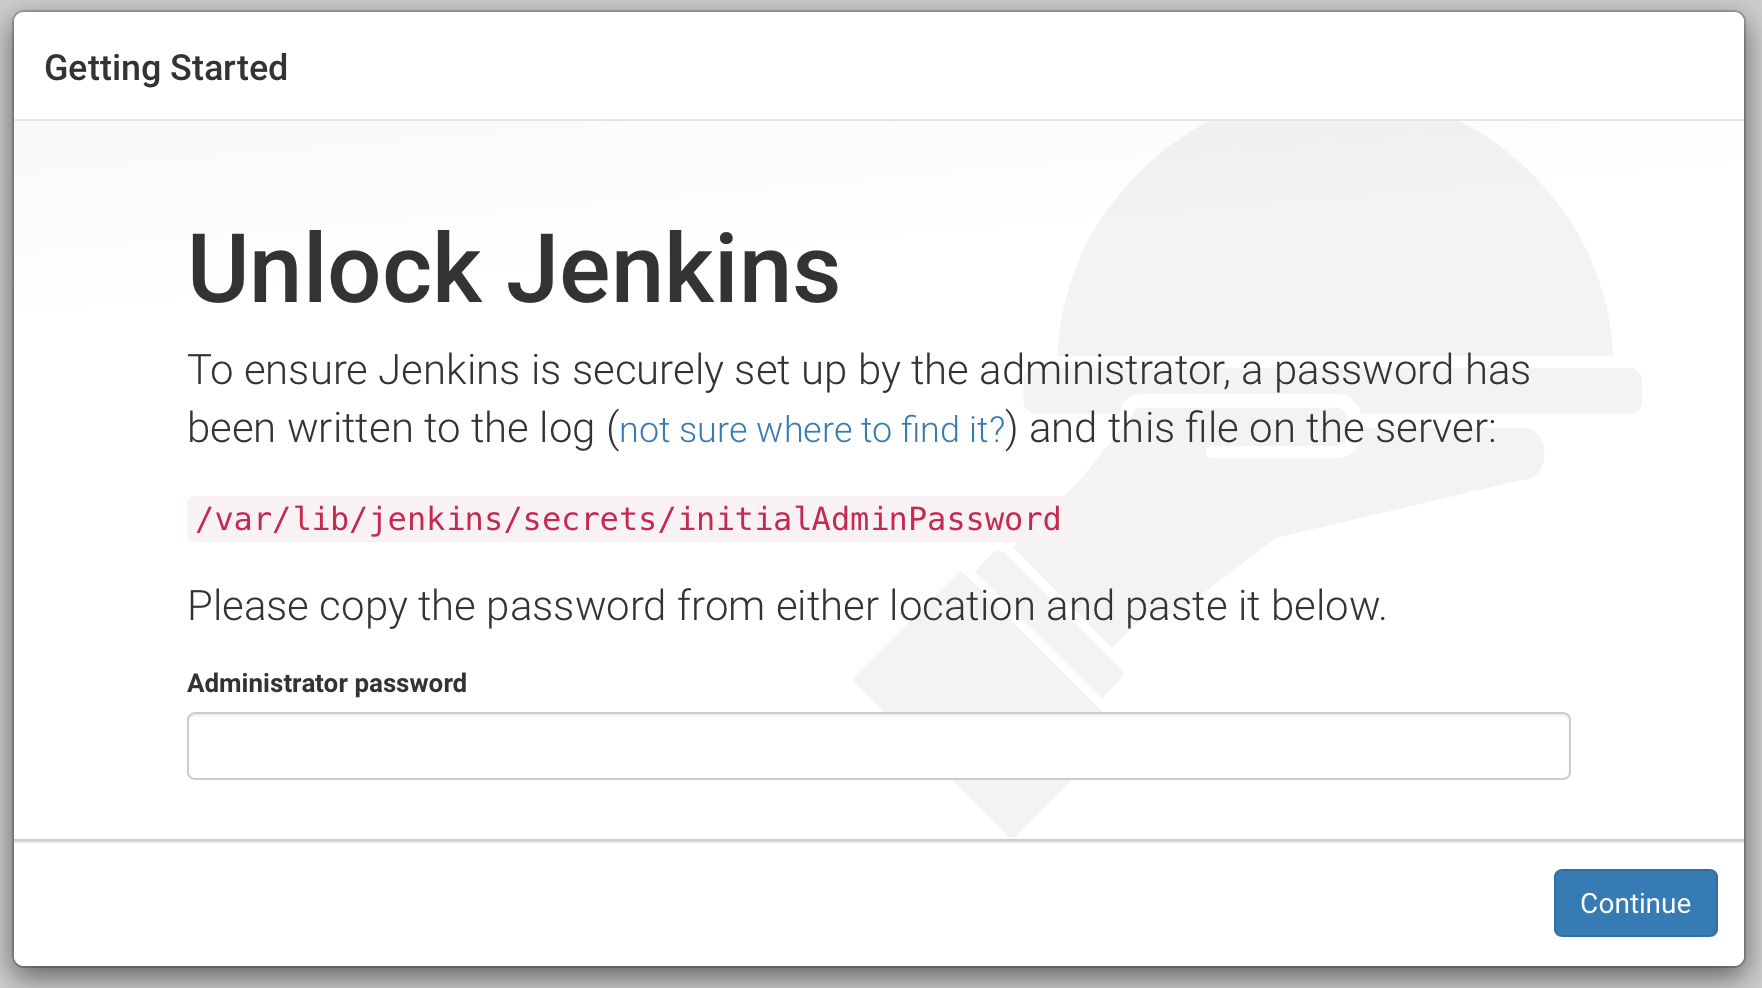
Follow the instructions for unlocking your Jenkins server. We will not install plugins at this step.
Plugins
Jenkins has a ton of plugins, but, we will use only a few of them:
- Amazon EC2 plugin: Can spawn ec2 instance on-demand and when you have queues jobs waiting capacities. Could spawn regular ec2 instances and spot instances.
- Build Pipeline Plugin: Not mandatory but is useful for triggering other jobs after a build (like a deploy)
- Build timeout plugin: Because, when a job is stuck, you want to fail the build and free the resource used
- GitHub Pull Request Builder: We use it for trigger jobs on push/pull request and update Github status
- Pipeline: If you want to have a single Jenkinsfile with the build definition directly with your code
- Timestamper: If you want to add time information in your build output
- Workspace Cleanup Plugin: Deleting our workspace before building can avoid some problems
- xUnit plugin: This plugin will record your test result and may fail the build on failure or if Jenkins can't parse tests result files.
Other useful plugins that you may need later:
- AnsiColor: Because some tools (linter, tests) output string with bash color and Jenkins do not render the color without it
- Copy Artifact Plugin: If you have some artifact to reuse in other jobs
- embeddable-build-status: Fancy but I love to have a status badge on my README
- Google Login Plugin: We use Google Apps and it's really useful not to create an account per user
- Green Balls: Because green is better than blue!
- Slack Notification Plugin: or other notification plugin, you can notify on deploying, on master failure/back to normal, etc.
Bonus - New Blue Ocean UI
If you want the new Blue Ocean UI, go to Manage Jenkins > Manage Plugins > Advanced and change the Update Site to: http://updates.jenkins-ci.org/experimental/update-center.json
You can now install the meta plugin (Alpha) BlueOcean :: UX
You should find a new button in your header:

In our current Jenkins server, it looks like this:
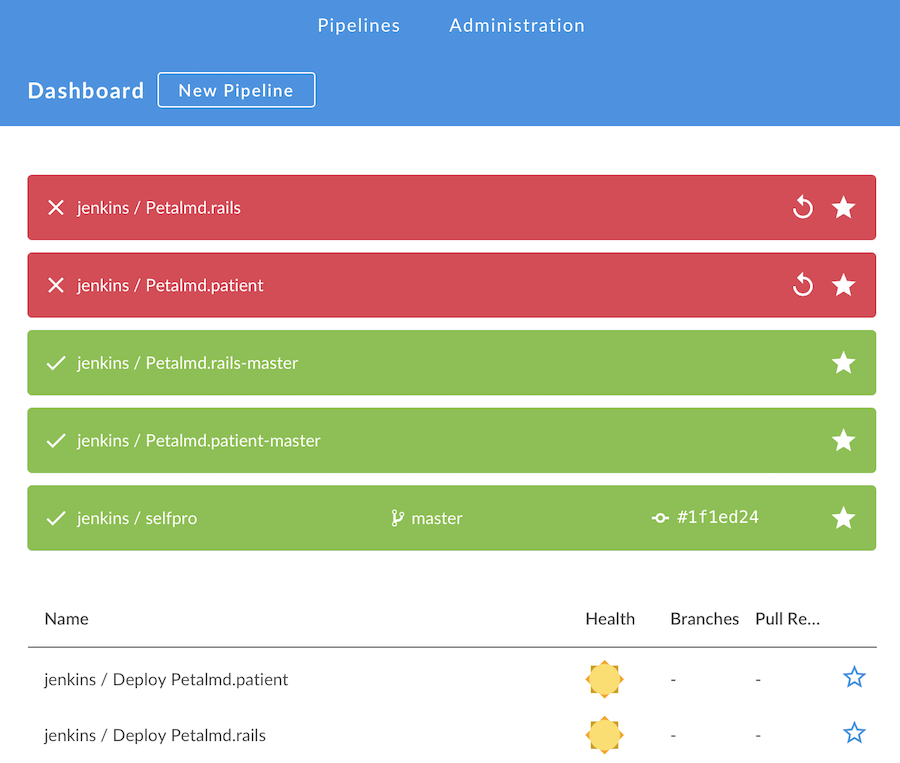
The top jobs are in my favorites, give a rapid dashboard.
We now have an empty running Jenkins master!
EC2 AMI configuration for Jenkins slaves
We will now configure our slave and we will update our master configuration after because we need the slave AMI to spawn.
Create a new EC2 instance with the Amazon Linux AMI 2016.03 AMI.
For the following instruction, you can prefix them with sudo or become root (see before).
Add base dependencies: java, git, docker and docker compose
$ yum install -y docker git java-1.8.0-openjdk
$ curl -L https://github.com/docker/compose/releases/download/1.6.2/docker-compose-`uname -s`-`uname -m` > /usr/local/bin/docker-compose
$ chmod +x /usr/local/bin/docker-compose
That's all!
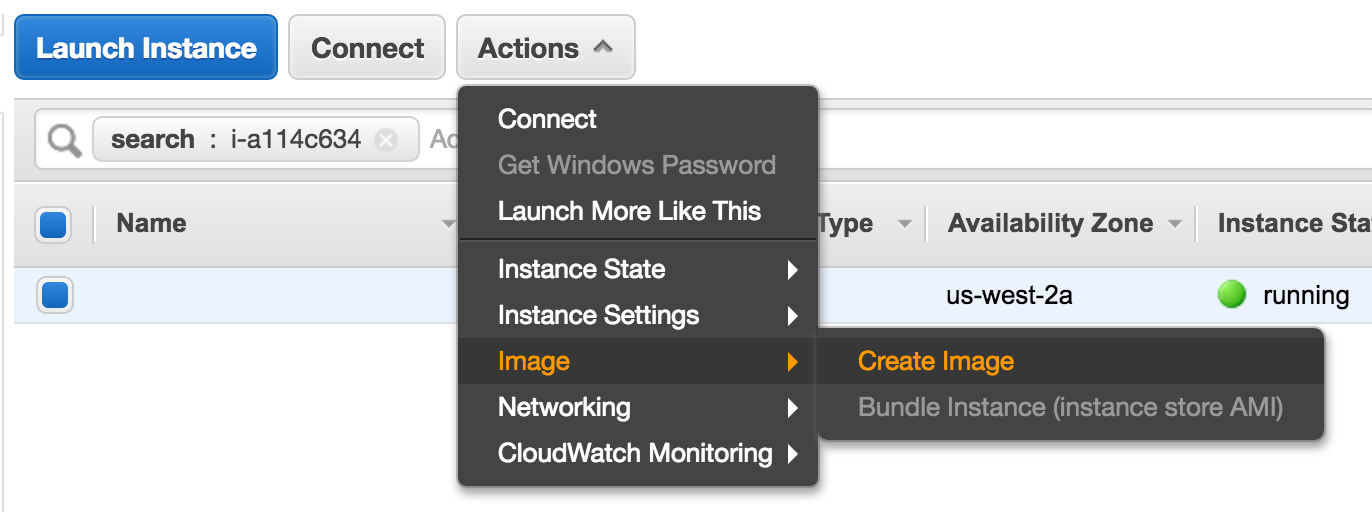
Create the AMI on AWS
On your EC2 panels > Instances, click on your Jenkins slave instance you just configure, and create a new image:
If your jobs need intensive IO, change the Volume type or the size of your image. Check Delete on Termination, our slave instance are disposable and we not want to conserve the volumes, if you have some artifacts, your job should save them, that will send them to your master.
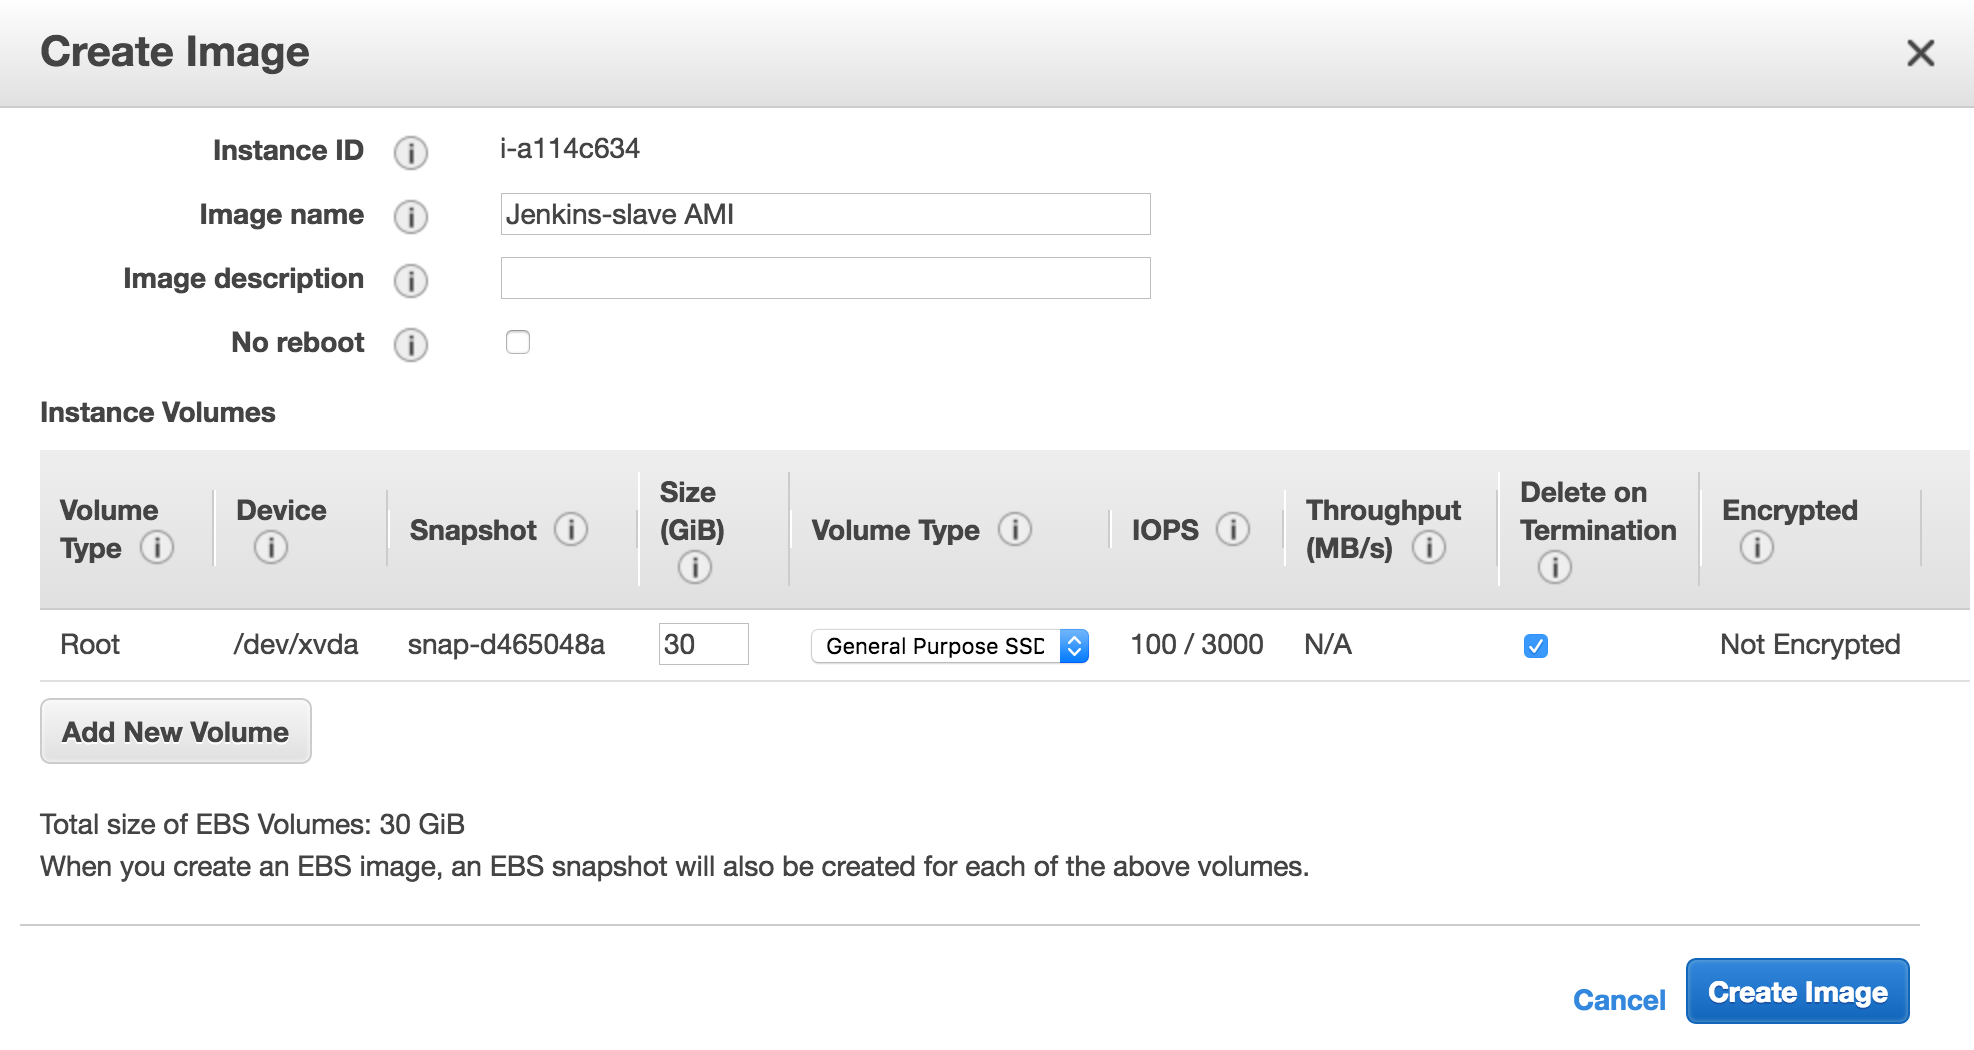
Once you create the image, you could find the AMI ID, we need it.

You can now drop your instance, we will not use it anymore.
Configure master to use our new AMI for spawning slave on demand
We can now finish our master configuration.
Create AWS credentials
On the sidebar, click on Credentials, hover (global) for finding the sub menu and add a credential.
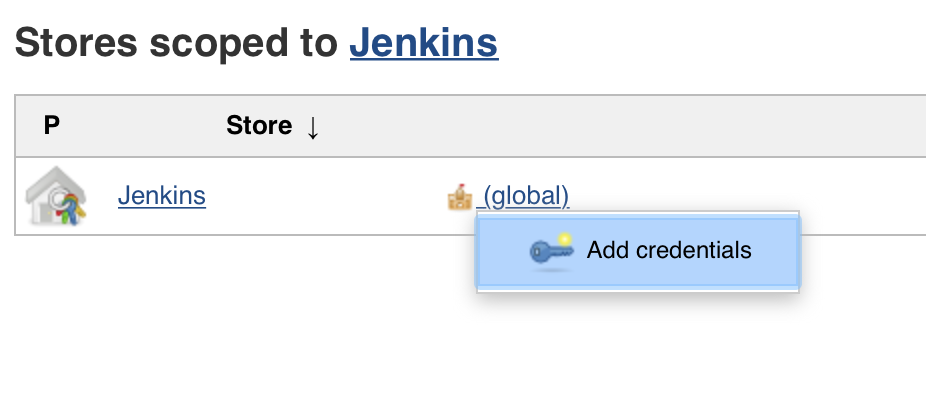
Choose AWS Credentials, and limit the scope to System, complete the form, if you make an error, Jenkins will add an error below the secret key.

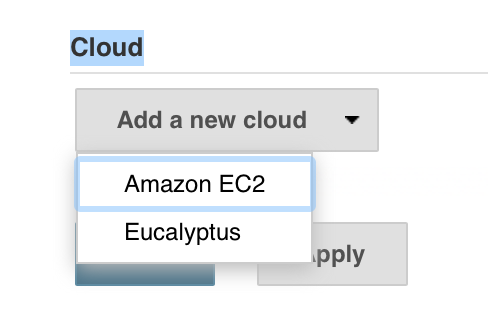
Add AWS as cloud providers
Manage Jenkins > Configure System, at the bottom of the page Cloud > Add a new cloud > Amazon EC2.
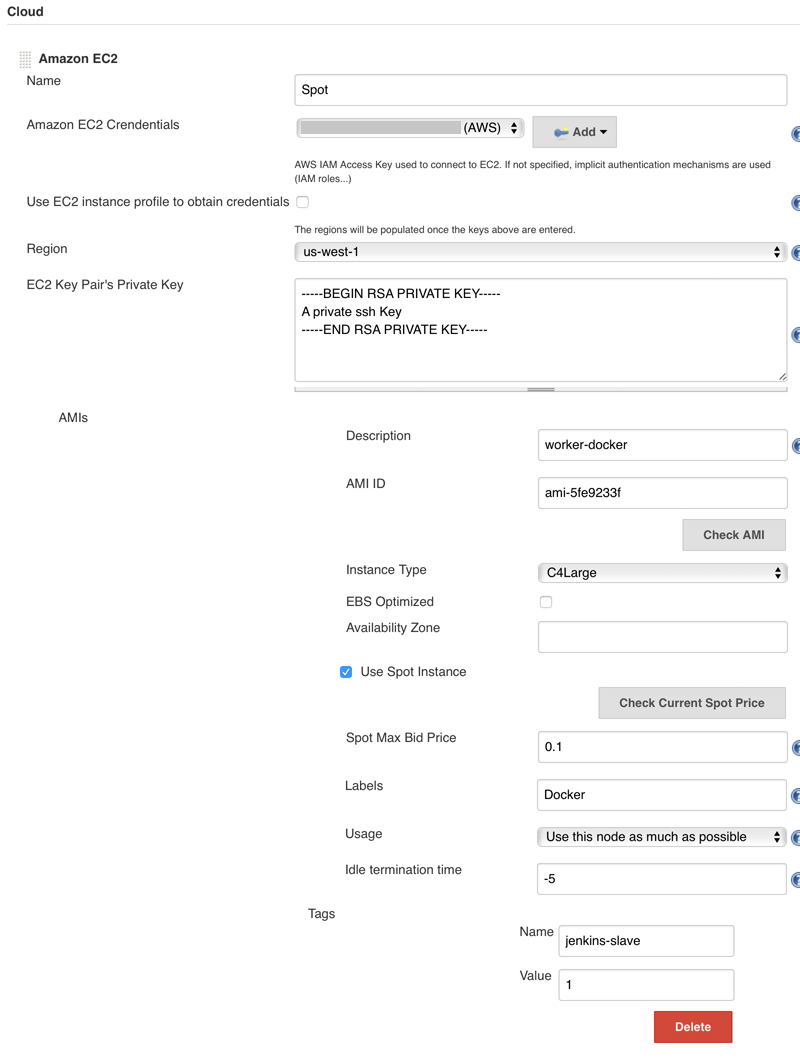
Complete the form, choose a Region, Instance Type, label.
If you set Idle termination time to -5, Jenkins will check continuously after 55 minutes until 60 minutes. If the slave becomes idle during this time, the instance will be terminated.
Click on Advance to find the Tags block. Add a tag with the name Jenkins-slave and value 1.
Congrats, we have a running master that can spawn slaves on needs!
Bonus - Jenkins with HTTPs with nginx and LetsEncrypt
Install dependencies
$ yum install -y epel-release nginx
$ wget https://dl.eff.org/certbot-auto
$ chmod a+x certbot-auto
$ mv certbot-auto /usr/local/sbin/certbot

# As certbot is currently experimental on Amazon Linux, we need to run it with --debug flag
# Install dependencies
$ certbot --debug

# Prepare nginx webroot for letsencrypt
$ mkdir -p /var/www/letsencrypt
$ chown -R nginx. /var/www
Create a base nginx configuration for creating our certificate: /etc/nginx/conf.d/jenkins.conf
upstream jenkins {
  server 127.0.0.1:8080 fail_timeout=0;
}

server {
  listen 80;
  server_name jenkins-demo.petalmd.com;

  location /.well-known/acme-challenge {
    root /var/www/letsencrypt;
  }
}
Start nginx: service nginx start
Now generate a new certificate with certbot:
$ certbot certonly --webroot -w /var/www/letsencrypt -d jenkins-demo.petalmd.com
Update the nginx configuration with the certificate and Jenkins back-end configuration:
upstream jenkins {
  server 127.0.0.1:8080 fail_timeout=0;
}

server {
  listen 80;
  server_name jenkins-demo.petalmd.com;

  location /.well-known/acme-challenge {
    root /var/www/letsencrypt;
  }
  location / {
    rewrite ^ https://$server_name$request_uri? permanent;
  }
}

server {
  listen 443 default ssl;
  server_name jenkins-demo.petalmd.com;

  ssl_certificate      /etc/letsencrypt/live/jenkins-demo.petalmd.com/fullchain.pem;
  ssl_certificate_key  /etc/letsencrypt/live/jenkins-demo.petalmd.com/privkey.pem;

  ssl_session_timeout  5m;
  ssl_protocols  SSLv3 TLSv1;
  ssl_ciphers HIGH:!ADH:!MD5;
  ssl_prefer_server_ciphers on;

  location / {
    proxy_set_header Host $http_host;
    proxy_set_header X-Real-IP $remote_addr;
    proxy_set_header X-Forwarded-Proto https;
    proxy_set_header X-Forwarded-For $proxy_add_x_forwarded_for;
    proxy_redirect http:// https://;

    add_header Pragma "no-cache";

    proxy_pass http://jenkins;
  }
}
You can update Jenkins configuration for only listen on 127.0.0.1:
# /etc/sysconfig/jenkins
JENKINS_LISTEN_ADDRESS="127.0.0.1"
You can add a cronjob for autorenew your certificate once a month:
crontab -e
0 0 1 * * /usr/local/sbin/certbot renew --quiet